
What Happens After You Get an ASN? A Complete BGP Setup Guide
You received your ASN. Now what? Learn how to configure RPKI ROAs, IRR route objects, BGP sessions, prefix announcements, and monitoring to turn your ASN allocation into a working Internet network.
Introduction
You applied for an ASN. You waited. And then it arrived — an email with a number like AS214953 and an IPv6 /48 prefix you can call your own.
For about five minutes, it feels great. Then the inbox goes quiet, and a less comfortable question settles in:
What do I actually do now?
The tutorials, the application guides, the comparison articles — they all stop here. "Congratulations, you have an ASN." As if receiving the number is the end of the story. It's not. Receiving the ASN is the moment the real work begins.

An ASN allocation gives you the resources; configuration turns them into a network.
This guide covers what happens after your ASN allocation: the steps nobody wrote down because the people who know them already did them years ago and forgot what it was like not to know.
What Should You Do After Getting an ASN? (Quick Answer)
- Secure your resources — Create RPKI ROAs for every prefix.
- Register routing objects — Add route and aut-num objects to an IRR database.
- Configure BGP — Install BIRD 2 or FRRouting and define your first BGP neighbor.
- Announce your prefix — Export your IPv6 allocation to your upstream via BGP.
- Verify propagation — Check bgp.tools and multiple looking glasses.
- Monitor continuously — BGP sessions, RPKI validity, route visibility.
After Getting an ASN: The Complete Checklist
After receiving your allocation, here is the exact sequence that turns those resources into a functioning network on the Internet:
- Create RPKI ROAs — Sign Route Origin Authorizations for every prefix you plan to announce. Without a valid ROA, your routes may be marked Invalid or Unknown depending on the validator state, and Invalid routes are increasingly rejected by major networks.
- Register IRR route objects — Document your ASN's routing policy in an Internet Routing Registry database. Many upstream ISPs reject BGP announcements without a matching route object.
- Configure BGP on your router — Install and configure a BGP daemon (BIRD 2 or FRRouting) on the server or router that will terminate your BGP sessions.
- Peer with upstream providers — Exchange peering details with each upstream ISP and bring BGP sessions to the "Established" state.
- Announce your IPv6 prefix — Configure your BGP daemon to export your prefix to your upstreams, starting the propagation of your routes across the Internet.
- Verify global propagation — Use bgp.tools, looking glasses, and RIPE Atlas to confirm your prefix is visible from multiple regions.
- Enable ongoing monitoring — Set up alerts for BGP session state, RPKI validity, and route visibility. An ASN is a living piece of infrastructure, not a one-time configuration.
After you receive an ASN, you must create RPKI Route Origin Authorizations, register route objects in an IRR database, establish BGP sessions with upstream providers, announce your prefixes, verify global propagation, and set up ongoing monitoring — before your ASN does anything useful on the Internet.
What Actually Arrives
When the allocation lands, you don't just get told "you're AS214963 now." You receive a bundle of resources, each with a specific purpose. Understanding what each piece is for determines what you do next.
The Allocation Bundle
| Item | What It Is | What You Do With It |
|---|---|---|
| ASN | A 32-bit number (e.g., AS214963) uniquely identifying your network in BGP | Use it to peer with upstreams, announce prefixes, and identify your network in routing tables |
| IPv6 allocation | Often a /48 for RIPE NCC end users — a block of IPv6 addresses for your exclusive use | Announce it via BGP; subdivide into /64 subnets for your servers and services |
| Maintainer object (RIPE direct) or Sponsorship confirmation (sponsored) | Proof of your relationship to the resources | Use the maintainer to update route objects and RPKI; keep the confirmation for future provider changes |
| Letter of Authority (sometimes) | Formal document proving you control the resources | Some upstream ISPs require this before configuring BGP peering |
The ASN and IPv6 prefix are the assets. But assets without configuration are just numbers in a database.
Typical ASN Deployment Workflow
To make this concrete, here's what a typical Autonomous System setup looks like from Day 0 to a fully operational BGP network:
You receive:
- AS214963 — your Autonomous System Number
- 2a14:xxxx::/48 — your IPv6 Provider Aggregatable prefix
The next 48 hours:
- ✅ Create ROA for 2a14:xxxx::/48 authorizing AS214963
- ✅ Register route object in RIPE IRR: "AS214963 originates 2a14:xxxx::/48"
- ✅ Install BIRD 2 on a Vultr VPS running Debian
- ✅ Configure BGP neighbor with upstream AS64500
- ✅ Bring BGP session to Established
- ✅ Announce 2a14:xxxx::/48 to upstream
- ✅ Verify on bgp.tools — prefix visible, RPKI status "Valid"
A typical deployment looks like this. While the exact providers and software may differ, the overall workflow is remarkably consistent across most new ASN deployments — whether for a home lab, a startup infrastructure, or an ISP. The sequence of steps is the same.
RPKI and ROA: Do This Before Anything Else
Before continuing, make sure you understand what your ASN is and why it matters. If you haven't already, read What Is an ASN? A Complete Beginner's Guide for the foundation this article builds on.
There's one step that, if skipped, means your BGP route announcements will be invisible to a growing fraction of the Internet — and you won't get an error message telling you why.
Create Route Origin Authorizations (ROAs) for every prefix you plan to announce.

A ROA authorizes your ASN to originate a prefix before the route is allowed onward.
Why This Matters
RPKI (Resource Public Key Infrastructure), defined in RFC 6480, lets network operators cryptographically verify that the ASN announcing a prefix is authorized to do so. Route Origin Validation, specified in RFC 6811, is the mechanism routers use to check ROAs and drop invalid BGP announcements. When you create a ROA, you're publishing a signed statement: "AS214963 is authorized to originate prefix 2aXX:XXXX::/48."
Networks that perform RPKI validation — and the list grows every year — will drop routes that lack a valid ROA, or that conflict with an existing one. Your BGP session can be fully established, your prefix perfectly announced, and still a third of the Internet won't see you. Not because you misconfigured anything, but because you never told the RPKI system you had the right to be there.
What to Do
If you're a direct RIPE NCC member:
- Sign into the RIPE Portal and navigate to the RPKI dashboard.
- Create a ROA for your IPv6 /48. Specify your ASN as the origin.
- If you have IPv4 space, create separate ROAs for each prefix.
- Verify the ROA appears in the RPKI validator within a few hours.
If you're sponsored through an LIR:
- Ask your sponsor whether ROAs have been created for your prefixes. If they handle RPKI on your behalf, confirm it's done.
- If you manage RPKI yourself through delegated access, follow the same steps as a direct member.
- Check bgp.tools or RIPEStat to confirm your prefix shows RPKI status "Valid."
Understand the routing security layer first. Read What Is RPKI? Securing BGP Route Advertisements for the full picture on how cryptographic validation protects your routes.
Route Objects and IRR: The Database Nobody Mentioned
RPKI proves you're authorized to announce a prefix. But many upstream ISPs also check a second system before accepting your routes: the Internet Routing Registry (IRR).
What IRR Is
The IRR is a distributed database where network operators document their routing policies. A route object in the IRR says: "AS214963 originates prefix 2aXX:XXXX::/48." An aut-num object describes your ASN's routing policy — which networks you peer with, what you import, what you export.
Without these objects, your upstream may reject your BGP announcements with a terse email: "No route object found."
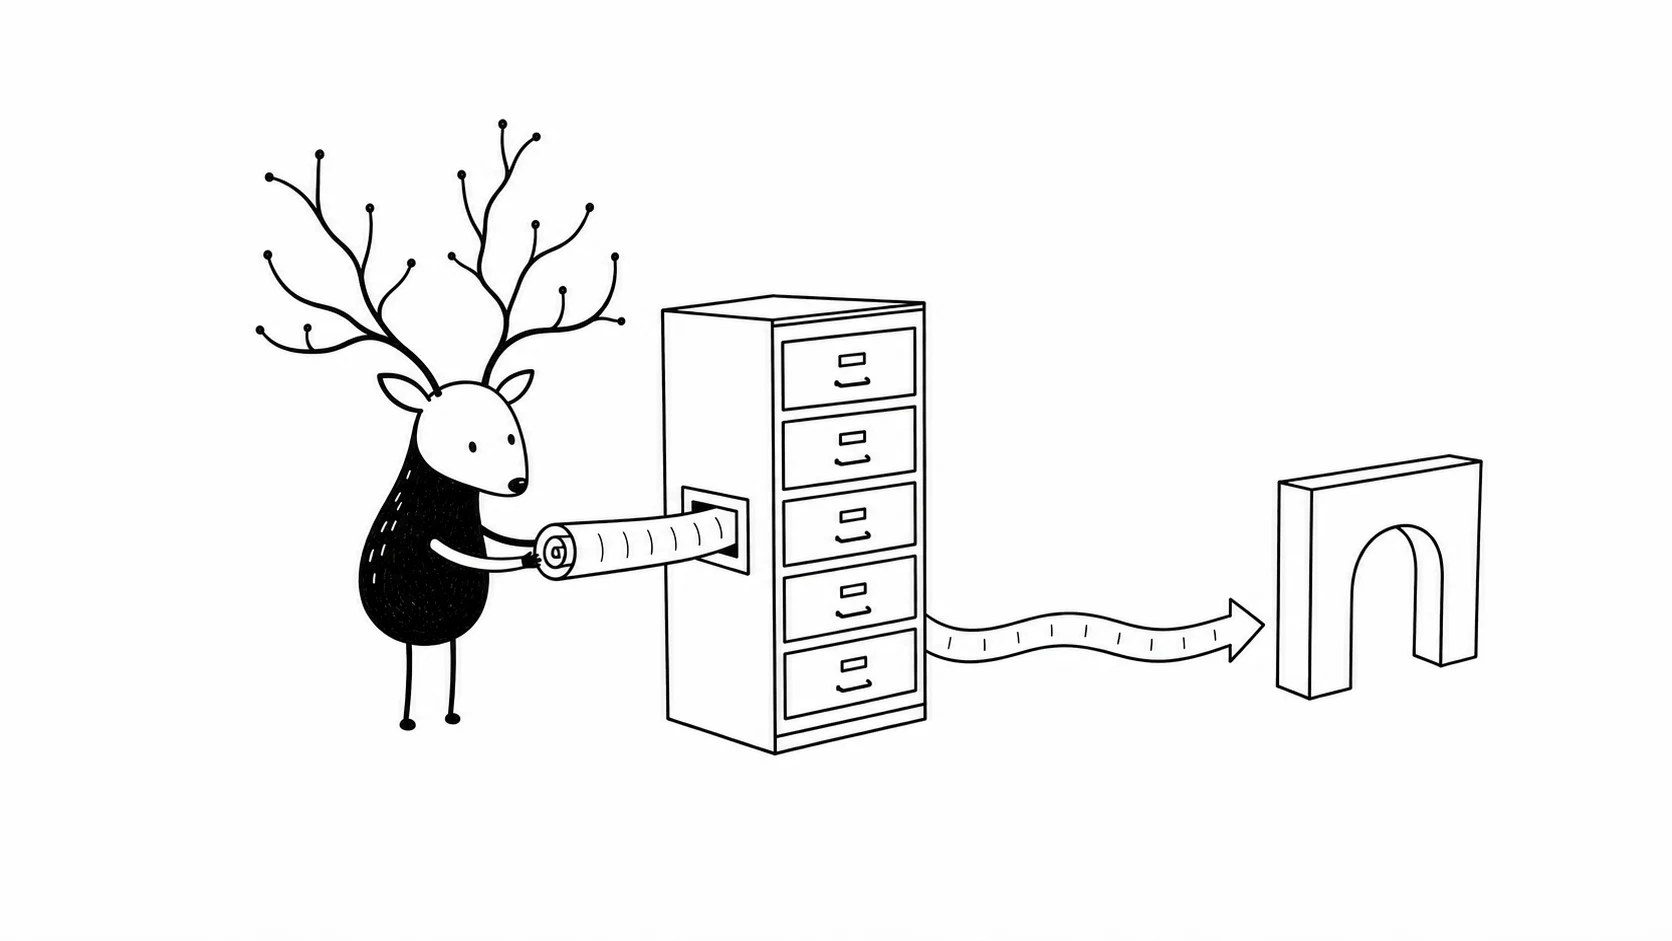
IRR route objects document the policy an upstream may require before accepting your announcement.
What to Do
- Create a route object for your prefix. If you're a RIPE member, use the RIPE IRR. If your sponsor handles this, confirm they've created one — or use a different IRR like RADb if needed.
- Create an aut-num object describing your ASN. Keep it simple: list your upstreams, state that you announce your prefix, and specify your import/export policies.
- Keep both updated. When you add a new upstream or change your prefix, update the IRR. Stale IRR data is almost as bad as no IRR data.
RPKI and IRR address different questions. RPKI asks: "Are you allowed to announce this?" IRR asks: "Is this your documented policy?" Upstream ISPs check both, and you need both to be right.
Your First BGP Session
With RPKI and IRR in place, you can now do the thing you actually got the ASN for: run BGP.
Before Contacting Your Upstream
You'll need to have ready:
- Your ASN
- The IPv6 /48 (and IPv4 prefix, if any) you plan to announce
- The IP addresses for the BGP peering session between you and your upstream — typically a /30 or /31 for IPv4 peering, or link-local addresses for IPv6
- Optionally, a BGP password (MD5 authentication) to protect the session
Your upstream will provide their side: their ASN, their IP for the peering, and any specific requirements (maximum prefix limits, community support, etc.).
What Happens When It Works
On your router or server running BGP (FRRouting, BIRD, OpenBGPD, or a cloud provider's BGP service), you configure a BGP neighbor with your upstream's ASN and peering IP. When both sides are configured, the session state transitions through:
Idle → Connect → OpenSent → OpenConfirm → Established
"Established" is the word you're looking for. At that point, routes can flow. Initially, you may only receive routes from your upstream — a full or partial BGP table showing every network they can reach.
Announcing your own prefix comes next.

The session only becomes useful once both sides complete the handshake and reach Established.
A Beginner's Configuration Skeleton (BIRD 2)
protocol bgp upstream_1 {
    local as 214963;
    neighbor 203.0.113.1 as 64500;
    ipv6 {
        export filter { if net = 2aXX:XXXX::/48 then accept; reject; };
    };
}
This tells BIRD: "I am AS214963. My upstream is AS64500. I will only announce my /48 to them." The real configuration will be more detailed — BGP communities, prefix limits, graceful restart — but the skeleton is always the same: who am I, who are you, what am I allowed to tell you.
For full configuration references, see the BIRD 2 User's Guide and FRRouting documentation. Both are production-grade open-source BGP daemons used by ISPs, IXPs, and enterprises worldwide.
New to BGP? Start with BGP Basics: How the Internet Learns Where to Send Traffic for a foundation in how routes propagate before configuring sessions.
How Your BGP Route Reaches the Internet

After an upstream accepts your route, each successive network can carry it farther into the global routing table.
Every network that receives your route adds its own ASN to the AS-path. After a few minutes, any router on the Internet knows: "To reach 2a14:xxxx::/48, go through AS64500, then AS214963."
Announcing Your Prefix
You have a BGP session. Now make your IPv6 prefix visible to the Internet.
Before you announce. Make sure ROAs are created and IRR route objects are registered. A BGP announcement without RPKI and IRR in place is a route that some networks won't see.
How BGP Route Announcement Works
When you announce a prefix via BGP, you're telling your upstream ISP: "Traffic for 2aXX:XXXX::/48 should come to me, AS214963." Your upstream accepts the BGP announcement, prepends its own ASN to the AS-path, and propagates it to its peers and upstreams. Within minutes, the global BGP routing table learns a new path to your Autonomous System.
Verifying Propagation
Don't trust that your announcement is working just because the BGP session is up. Verify from outside your network:
- bgp.tools — Search for your ASN. The site shows every prefix you announce, every peer you connect to, your RPKI status, and how your routes are seen from different parts of the world.
- Looking glasses — Public BGP route viewers run by tier 1 ISPs and IXPs. Query your prefix from multiple locations and confirm it appears with the correct AS-path.
- RIPE Atlas — Run a traceroute or ping measurement from hundreds of global probes toward an IP in your prefix. This tells you whether traffic actually reaches you, not just whether the route exists.
- RIPEStat — Check your prefix's routing history and RPKI status in one dashboard.
A prefix that's announced but not reachable is worse than a prefix that's not announced — it's a blackhole. Verification is not optional.
The Multi-Homing Reality
Many people get an ASN specifically to connect to multiple upstreams — multi-homing. If that's your plan, here's what changes.
Two Upstreams, Twice the Sessions

Two upstreams provide redundancy only when both BGP sessions are monitored and kept healthy.
With two upstreams, you run two BGP sessions. Each is an independent peering, potentially with different requirements, different community support, and different views of the routing table. You announce the same IPv6 prefix to both — that's what gives you redundancy. If one upstream goes down, the other still carries your traffic.
You Now Control Path Selection
With a single upstream, you accept whatever path traffic takes. With two, you can influence it. Common knobs:
- Local Preference — Tell your router to prefer one upstream over the other for outbound traffic.
- MED (Multi-Exit Discriminator) — Suggest to your upstream which path they should use to reach you (honored inconsistently, but worth setting).
- AS-Path Prepend — Make your announcement through one upstream look less attractive by artificially lengthening the AS-path, steering inbound traffic toward the other.
What Breaks
If one BGP session drops and you don't notice, you're not multi-homed anymore. Traffic will still flow through the remaining upstream, but you've lost redundancy and you don't know it. BGP session monitoring — checking that both sessions stay Established — is the minimum viable alert.
For the full picture on multi-provider architectures, read What Is Multihoming? Why One Internet Connection Isn't Enough.
Ongoing Operations: What to Monitor
An ASN is not a one-time setup. It's a living piece of Internet infrastructure. Things break. Routes flap. Certificates expire. ISPs change policies. If you're not watching, you'll find out from a user — or worse, from a customer's screenshot on social media.
The Minimum Viable Monitoring Stack
| What | How | Why |
|---|---|---|
| BGP session state | Your router's telemetry, or a simple uptime check on the BGP daemon | A dropped session means lost connectivity — catch it before users do |
| Route propagation | bgp.tools, RIPE RIS, or RouteViews | Your prefix should be visible from every major network; gaps mean reachability problems |
| RPKI validity | RIPEStat, or your RIR's RPKI dashboard | Expired or missing ROAs cause routes to be dropped silently |
| IRR accuracy | Check your route objects periodically, especially after upstream changes | Outdated IRR data causes your announcements to be rejected by new peers |
| Prefix hijack alerts | BGPalerter, or your upstream's monitoring | Someone else announcing your prefix is a hijack — you need to know immediately |
Tools Worth Bookmarking
- bgp.tools — Instant view of your ASN: prefixes, peers, upstreams, RPKI status, route visibility. The first place you check when something feels wrong.
- RIPEStat — RPKI validation, routing history, geolocation of your prefixes. More comprehensive than bgp.tools for RIPE-region resources.
- RIPE NCC RPKI Documentation — Official RIPE NCC guide to RPKI, ROA creation, and route origin validation.
- Hurricane Electric BGP Toolkit — Quick ASN and prefix lookup with peer graphs.
- Cloudflare Learning Center: What is BGP? — Accessible introduction to BGP routing and how the Internet's routing table works.
- Looking glasses — HE, Cogent, NTT, and many IXPs offer public BGP route viewers. Query your prefix from different networks to confirm global propagation.
The Numbers Behind Your ASN
The Internet you're joining is larger — and more secured — than most newcomers realize.
- RPKI coverage: Recent NIST RPKI Monitor measurements show that more than half of globally visible routes now have valid ROAs. In the RIPE NCC service region, adoption is even higher — most large ISPs and cloud providers enforce strict validation, rejecting Invalid routes.
- Routing table size: The global IPv4 BGP table now exceeds 1,000,000 routes. The IPv6 table exceeds 250,000 routes and is growing steadily. (CIDR Report)
- RPKI-validating networks: Over 50% of Internet users worldwide are behind networks that perform RPKI Route Origin Validation, per APNIC measurements. In the RIPE NCC service region, the figure is even higher.
These numbers explain why steps that might feel optional — creating ROAs, monitoring route propagation — are mandatory in practice. You're not joining a small club. You're plugging into a global infrastructure where over half the participants already verify that announcements are authorized.
The Timeline: Day 0 to Week 4
Everyone asks "how long does this take?" Here's the workflow, end to end:
Receive ASN + IPv6 /48
        │
        ▼
Create RPKI ROAs
        │
        ▼
Register IRR Route Objects
        │
        ▼
Configure BGP Daemon (BIRD 2 / FRRouting)
        │
        ▼
Peer with Upstream ISP
        │
        ▼
Announce Prefix via BGP
        │
        ▼
Verify Propagation (bgp.tools + Looking Glasses)
        │
        ▼
Set Up Monitoring
And in calendar terms:
| Phase | What Happens | Key Actions |
|---|---|---|
| Day 0 | ASN + IPv6 /48 allocation received | Save allocation details. Confirm ROA creation path (self or sponsor). |
| Day 0–1 | RPKI + IRR setup | Create ROAs for all prefixes. Register route and aut-num objects in IRR. Verify RPKI status shows "Valid." |
| Day 1–7 | BGP session establishment | Contact upstream ISPs. Exchange peering details. Configure BGP on your router/server. Bring sessions to Established. |
| Day 7–14 | Prefix announcement + verification | Announce prefixes. Check propagation on bgp.tools and multiple looking glasses. Run RIPE Atlas measurements. Tune BGP policies (localpref, prepend) if multi-homed. |
| Day 14–30 | Stabilization | Set up monitoring. Test failover if multi-homed. Document your setup — future you will thank present you. |
| Ongoing | Maintenance | Monitor BGP sessions, RPKI validity, and route propagation. Update IRR when topology changes. Renew anything that expires. |
The timeline stretches when you're figuring things out for the first time. That's normal. Every network engineer who runs BGP today once stared at a terminal wondering if "Established" meant what they thought it meant.
6 Common Mistakes After Getting an ASN
Most first-time ASN holders encounter the same set of problems. Knowing them in advance saves hours of debugging.
1. Skipping RPKI Entirely
The most common mistake: BGP session is up, prefix is announced, everything looks fine — but a significant fraction of the Internet can't reach you. The cause is almost always missing ROAs. Networks like Cloudflare, Amazon, and many European ISPs perform strict RPKI validation and drop invalid or missing ROAs automatically. Create ROAs before you announce anything, not after you notice traffic is missing.
2. Forgetting the IRR Route Object
Even with valid ROAs, some upstream ISPs run an additional check: they look up your prefix in an IRR database before accepting your BGP announcement. If no route object exists, they reject the announcement — often without sending you a clear error. The first sign is usually: "My BGP session is up, but my prefix isn't showing on bgp.tools." Register the route object before you peer.
3. Assuming Your Prefix Propagates Instantly
BGP propagation is fast but not instant. Some networks update their routing tables within seconds; others take 10–30 minutes. If you announce and immediately check a looking glass across the world, don't panic if it hasn't appeared yet. Wait 15 minutes, then verify from multiple locations.
4. Not Setting a Maximum Prefix Limit
If your upstream doesn't enforce a maximum prefix limit on your BGP session, and a misconfiguration causes your router to leak routes — announcing routes you've learned instead of only your own — you could accidentally become a transit network or flood the global BGP table with bogus routes. Both scenarios get your peering terminated. Set maximum-prefix limits on every BGP session.
5. Neglecting Monitoring
An ASN without monitoring is like a server without health checks. BGP sessions can drop silently. ROAs can expire. Route objects can become stale. Prefixes can be hijacked. If you're not watching, you'll find out when users complain — or when a customer's screenshot of your downtime appears on social media. Set up at least BGP session monitoring and RPKI validity checking from day one.
6. Not Documenting Your Setup
Six months after configuring BGP, you won't remember which upstream requires which community string, which IRR database you registered in, or why you set localpref to 150 for one peer and 100 for the other. Write it down. A simple text file with your ASN details, upstream contacts, BGP configuration rationale, and renewal dates saves hours of archaeology later.
Troubleshooting
Two problems account for the vast majority of "my ASN isn't working" posts on networking forums. Here's what to check, in order.
BGP Session Won't Establish
You've configured BIRD or FRRouting. The session sits in Active or Connect instead of Established. Check these, roughly in order of likelihood:
- ASN mismatch — Your configured local AS doesn't match what your upstream expects, or their AS doesn't match what you configured. Double-check both numbers.
- Wrong peering IP — The IP address you're trying to peer with isn't the one your upstream assigned. For IPv6, confirm you're using the correct link-local or global address.
- Firewall blocking BGP — BGP uses TCP port 179. If a firewall between you and your upstream blocks it, the session can't form.
- MD5 password mismatch — If one side has a BGP password configured and the other doesn't, or the passwords differ, the session fails silently.
- TTL / multi-hop — If your peering IP isn't directly connected (more than one hop away), you need
ebgp-multihopenabled. Most upstreams expect single-hop eBGP.
Prefix Announced But Not Visible
Your BGP session is Established. You've configured your export filter. But bgp.tools shows no prefix, or it shows the prefix but looking glasses in other regions don't see it.
- ROA missing or invalid — Check RIPEStat. If RPKI status shows "Unknown" or "Invalid" for your prefix, create or fix the ROA.
- IRR route object missing — Your upstream may reject the announcement if no route object exists. Check the IRR database you registered in.
- Export filter not matching — BIRD and FRRouting export filters are exact. If your filter says
net = 2a14:xxxx::/48but your actual prefix is slightly different, nothing is announced. - Upstream filtering — Your upstream may apply inbound prefix filters. If you haven't told them your prefix, they may reject it even if the session is up. Send them your prefix details.
- Propagation delay — Wait 15–30 minutes and check again. BGP propagation is not instant.
Routes Inconsistent Between Regions
Your prefix is visible from Europe but not Asia, or vice versa. This usually means one upstream accepted your announcement and the other didn't, or you're single-homed and the missing region simply doesn't receive the route through that path. Check propagation from multiple looking glasses and confirm all BGP sessions are Established. If you're multi-homed, verify each upstream independently.
FAQ
How long after getting an ASN can I announce routes?
You can announce as soon as ROAs and IRR route objects are in place. For a direct RIPE member, this can be the same day. The limiting factor is RPKI propagation delay — a few hours for ROAs to become visible to validators globally. For sponsored ASNs, confirm your LIR has created ROAs before you begin.
Can I use an ASN with IPv6 only?
Yes. Many new Autonomous Systems are IPv6-only. You don't need an IPv4 prefix to establish BGP sessions or announce routes. Providers including Hetzner, OVH, and Vultr support IPv6 BGP peering. Both the peering transport and your prefix announcements can be exclusively IPv6.
Can I run BGP from a VPS or cloud server?
Yes — provided the provider supports BGP peering. Vultr, Hetzner, BuyVM, and others allow customers to announce their own prefixes. A €15/month VPS running BIRD 2 or FRRouting can terminate BGP sessions — the hardware isn't the barrier, the configuration is. For full-table multi-homed deployments you'll want more RAM, but for announcing your own prefixes with a default route, modest resources suffice.
Does every ASN need RPKI?
Technically no, but practically yes. Major cloud providers and most European ISPs now enforce RPKI validation — skipping ROAs means your routes are invisible to all of them. Creating ROAs takes minutes; the consequence of skipping it can be weeks of unexplained partial reachability and missing traffic.
Can I have multiple prefixes on one ASN?
Yes. A single ASN can announce multiple IPv6 prefixes and IPv4 prefixes simultaneously. Each prefix must have its own ROA and IRR route object, but they all share the same ASN as their origin. There is no practical limit on how many prefixes an ASN can originate.
Can you use an ASN without BGP?
Technically, an ASN can be assigned without running BGP — for instance, as an identifier in WHOIS or IRR records. But for Internet routing, an ASN without BGP is like a passport without a plane ticket. The ASN's purpose is to identify you in the global BGP routing table; without peering sessions and prefix announcements, it's just an entry in a database.
What is the difference between an ASN and an IP prefix?
An ASN identifies who you are in BGP — your network's unique identity. An IP prefix identifies what addresses you control — the destinations you announce. You need both: the ASN to participate in BGP peering, and at least one prefix to announce so other networks know how to reach your addresses.
Can I transfer my ASN to a different sponsor?
Yes, under RIPE NCC policy, resources can transfer between LIRs — but the process requires cooperation from both parties and can take weeks. If your sponsor stops operating, the transfer path depends on who holds the maintainer object. Before signing, ask about the transfer-out process — the answer matters more than the annual price.
Can I change upstream ISPs later?
Yes. Provider independence is one of the core benefits of having your own ASN. You can add, remove, or change upstreams without renumbering your IP space. Your prefix stays the same, your ASN stays the same. Update your BGP configuration and IRR records, and you're done.
Do I need an Internet Exchange (IXP)?
No — private peering with upstream ISPs works fine. An IXP becomes valuable when you want to peer with many networks in one place, often at lower cost than paying for transit to reach them. Most small ASN operators start with private peering and add IXP connections as their network grows.
How is this different from cloud provider networking?
Cloud networking delegates routing decisions to the provider. You consume their ASN, their BGP configuration, their upstream relationships. With your own ASN, you choose your upstreams, control your routing policy, and can move your IP space between providers. The tradeoff: you now own the operations burden described in this article.
What's Mandatory vs. Recommended
Not every step in this guide carries equal weight. Here's the breakdown:
| Step | Mandatory | Recommended | Why |
|---|---|---|---|
| RPKI ROAs | ✅ | Networks that validate RPKI will drop routes without valid ROAs — no ROA, no reachability from those networks | |
| IRR route objects | ✅ | Many upstream ISPs require a matching route object before accepting your BGP announcement | |
| BGP session configuration | ✅ | The BGP session is the foundation — without it, your ASN is just a number | |
| Prefix announcement | ✅ | No announcement, no route propagation, no traffic | |
| Propagation verification | ✅ | An announced prefix that's not actually reachable is a blackhole — verify from outside your network | |
| BGP session monitoring | ✅ | Dropped sessions mean lost redundancy — catch them before users do | |
| RPKI validity monitoring | ✅ | Expired ROAs cause routes to be dropped silently — check periodically | |
| Maximum prefix limits | ✅ | A route leak from your ASN can get your peering terminated — prevent it with a single config line | |
| Multi-homing | ✅ | Redundancy requires at least two upstreams — but a single-homed ASN with its own prefix is still valuable | |
| Documentation | ✅ | Six months from now, you won't remember why you set localpref to 150 |
How Experience Changes the Workflow
The same steps play out differently depending on whether it's your first ASN or your fifth:
| Task | First-Time ASN Operator | Experienced Network Operator |
|---|---|---|
| RPKI ROAs | May not know they exist; creates after reading this guide | Creates ROAs before the first BGP session comes up |
| IRR route objects | Discovers IRR when upstream rejects announcement | Pre-registers route objects as part of allocation checklist |
| BGP configuration | Starts from a tutorial, copies a skeleton config | Has a templated config; changes only ASN, peer IP, and prefix |
| Propagation verification | Checks one looking glass and assumes it worked | Checks bgp.tools, multiple looking glasses, and RIPE Atlas from different regions |
| Monitoring | Sets up after the first incident | Monitoring is Day 1 — BGP session alerts, RPKI expiry checks, prefix hijack detection |
| Documentation | "I'll write it down later" | Commits config to git, documents upstream contacts and community strings immediately |
The difference isn't knowledge — it's checklist discipline. Every item on the experienced operator's list is something the first-timer also knows about after reading this guide. The experienced operator just does them in order, every time, without skipping steps.
Conclusion
Getting an ASN feels like arriving at the summit. It's not. It's arriving at base camp — the real climb starts here.
The work described in this article — RPKI, IRR, BGP configuration, prefix announcement, monitoring — is not a checklist you finish and forget. It's the operational surface of running independent Internet infrastructure. Every network engineer who's done it has, at some point, stared at a BGP session that should be up but isn't, or a prefix that should be visible but isn't, and worked through the same diagnostic steps in the same order.
Whether your goal is running a home lab, announcing your own IPv6 prefix, building an anycast network, or operating an ISP — the workflow after receiving an ASN is fundamentally the same: secure it with RPKI, document it in IRR, peer it via BGP, announce it to the Internet, verify it across the global routing table, and monitor it for the long term. Whether you're configuring BIRD on a €15 VPS or FRRouting on production hardware, whether you're multi-homed across two upstreams or peering at an IXP, the checklist doesn't change.
Mastering these steps turns an ASN from a number in a database into a fully operational Autonomous System that controls its own routing destiny on the Internet.
What will you build with yours?
Key Takeaways
- Receiving an ASN is the beginning, not the end — RPKI, IRR, BGP sessions, and prefix announcements all come after allocation.
- Create ROAs before announcing anything — networks performing RPKI validation will drop routes without valid ROAs, silently and without warning.
- Register route objects in an IRR database — many upstream ISPs reject BGP announcements that lack a documented routing policy.
- Establishing your first BGP session means configuring your router, exchanging peering details, and reaching the "Established" state.
- Verify prefix propagation from outside your network — use bgp.tools, looking glasses, and RIPE Atlas to confirm the Internet can see your routes.
- Multi-homing with two upstreams gives you redundancy but doubles your operational responsibility — monitor each session independently.
- Ongoing monitoring is not optional: BGP session state, RPKI validity, IRR accuracy, and route visibility all need attention for the lifetime of your ASN.
In One Sentence
Receiving an ASN is the easy part; the work that makes it route traffic on the Internet — RPKI, IRR, BGP peering, prefix announcements, and ongoing monitoring — is what separates a number in a database from a functioning Autonomous System.
Continue Reading
- What Is an ASN? A Complete Beginner's Guide — the foundation. Understand what you just received and why it matters.
- How to Get Your Own ASN: Requirements, Costs, and Application Options — the step before this one. If you haven't applied yet, start here.
- BGP Basics: How the Internet Learns Where to Send Traffic — the protocol you'll be configuring. Understand how routes propagate before you configure your first session.
- What Is RPKI? Securing BGP Route Advertisements — the security layer that protects your announcements. Read this alongside the RPKI section above.
- What Is Multihoming? Why One Internet Connection Isn't Enough — the architecture that makes your ASN redundantly connected to the Internet.
- Transit vs Peering: What's the Difference? — understand the two ways your ASN connects to the rest of the Internet.
- ASN Cost Explained: Registration Fees, Sponsorship & LIR Pricing — if you're still evaluating the economics, understand what you're paying for.
Ready to get your own ASN?
Full RIPE NCC LIR sponsorship — ASN + /48 IPv6, one flat fee. RIPE NCC compliant, UK-based LIR.
See Pricing →